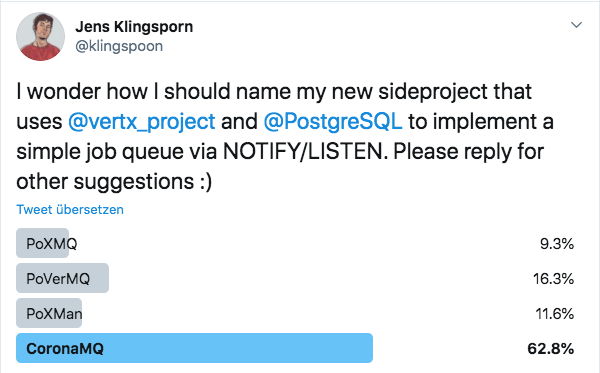
It’s been a while since I started this pet-project of mine: it was a proof-of-concept message queue that uses PostgreSQL, the vertx-postgres-driver and it’s NOTIFY LISTEN support. The idea was, that if a row was added in to a table (jobs, tasks, you name it), Postgres would send a notification to the driver. The driver would then send this notification, alongside with the task’s payload, over the vertx eventbus and some worker would react to it. The following figure visualizes this concept:
This was already two years ago and since then I didn’t invest more time into it – like with any other sideproject you start. But then, two things happened: vertx added support for Future-APIs in their code-generator and I caught Covid – no joke. I started to play around with the code-generator and created APIs for mutiny and rxjava. I read about and added vertx-service-proxies for the TaskRepository, decoupled the participants (Broker, TaskRepository and Workers) using vertx-service-discovery, added metric-profiling with Mircometer and started using Testcontainers for the integration tests.
Now, again, a couple of months later, I finally found some time to upload the project to maven-central and share it with the world. I’m happy with the result and think it’s a cool real-world-application that uses awesome open source libraries. If you have any feedback, I’m happy to hear it, either in the comments, on Twitter or on the github-page.
When working with OneSignal, you sometimes receive an API response telling you that the notification you’ve sent does not have any recipients (“All players are not subscribed”). This can either mean that the notifications you’ve setup are not working like intended (e.g. you’re using wrong filters) or that a former active user of yours became inactive and cannot be addressed any longer. In case you are targeting users using tags this can happen quite frequently.
To avoid the cost of creating a OneSignalException in that case there is an option now to prevent vertx-push-onesignal from creating these exceptions in case that response is received from the OneSignal API.
See my github-page for an example how to set it up properly.
JMX is useful to gather various information about a running Java application. Mostly it is used to gain detailed data about CPU-consumption (where are the hotspots in my code?) or Memory-allocation (what is eating up my memory?). Especially when a system is under load and behaves ‘unexpectedly’ that information is valuable. Here are the steps you have to take in order to get remote access to JMX when you host your servers in the Amazon cloud behind a loadbalancer.
1. Associate Public IP Address
The servers that are created in your ElasticBeanstalk environment need to have a public IP-Address. To do this, make sure you’ve selected the following option in your Elastic Beanstalk environment’s configuration:
Elastic Beanstalk → Your Application → Your Environment → Configuration → VPC → Associate Public IP Address
Be aware that exposing the instances behind a LB undermines it’s purpose: only having one public end-point. By making all your instances public, they are open for attacks of any kind!
2. Change server startup parameters
A quick search on stackoverflow reveals the required arguments you have to add to your Java application:
In a previous post I’ve described how to pass these arguments to the Java application (add them as JAVA_OPTS) and choosing a PORT is trivial. However you should use the same port for .port and .rmi.port to minimize the ports you have to open in the security group later on.
Now what about the PUBLIC_IP? If you leave out this parameter, JMX will most likely bind to the private IP-Address and you wont be able to access it from outside. My first attempt was checking the instance’s environment variables to see if the server’s public IP is added there. Unfortunately it was not. My second attempt was to expose an environment variable JMX_IP utilizing .ebextensions like this:
The idea was to export an environment variable JMX_IP and then reference it in the JAVA_OPTS like so -Djava.rmi.server.hostname=${JMX_IP} which did not work as well. I’m not sure why (maybe you know?), but I ended up changing the script that builds my deployment artifact:
This file contains bidirectional Unicode text that may be interpreted or compiled differently than what appears below. To review, open the file in an editor that reveals hidden Unicode characters. Learn more about bidirectional Unicode characters
This results into the following run.sh file which is executed during deployment:
This file contains bidirectional Unicode text that may be interpreted or compiled differently than what appears below. To review, open the file in an editor that reveals hidden Unicode characters. Learn more about bidirectional Unicode characters
As you can see, the public ip address is fetched from the instance’s meta-data URL and added as an option to the Java process. If you added the startup parameters from above, the server should start JMX and expose it on the public IP address.
3. Open JMX port in security group
In the final step you have to open a port to be able to connect to your server. Before we proceed, be aware that we disabled any authentication! That means that as soon as the port is open, anyone that knows the IP of your server can access to it. Therefore, either close the port as soon as you’re finished your work and/or add SSL to your JMX configuration!
To open the port, I recommend creating a new security group under
EC2 → Security Groups → Create Security Group
in your VPC. Add an Inbound rule to open a TCP port you’ve chosen for JMX (if you decided to give a different port for rmi, it has to be opened as well) and add your IP address as the source. Note the security group’s name (e.g. sg-abcdefg) and add it to your Elastic Beanstalk configuration:
Elastic Beanstalk → Your Application → Your Environment → Configuration → Instances → EC2 security groups
Finally, you should be able to add and connect the EC2 instances using jvisualvm.
vertx-jooq-async the (un)beloved child of vertx-jooq has been released in version 0.4! This version finally implements insertReturningPrimaryAsync in all VertxDAOs*.
In addition, the complex code in the DAOs default methods has been abstracted and moved to vertx-jooq-async-shared. That means less code duplication and fewer points of failure – a move that will very likely be done in vertx-jooq soon as well.
Finally the vertx-dependency version has been bumped to 3.5. (and so the support for RXJava2).
* Unfortunately, this only works for MySQL and numeric auto-increment keys. That is, because the implementation is based on the implementations of io.vertx.ext.asyncsql.impl.AsyncSQLConnectionImpl and only the MySQL variant returns the generated ID.
Sometimes I find myself in the situation where I have to perform some asynchronous tasks and perform another asynchronous task when all those tasks have been completed. As always in such situations, I’ve searched stackoverflow for a how-to and the top rated answer suggests the following solution:
This file contains bidirectional Unicode text that may be interpreted or compiled differently than what appears below. To review, open the file in an editor that reveals hidden Unicode characters. Learn more about bidirectional Unicode characters
That solution totally works and it is good. However, if you often deal with Streams, a more functional approach would be neat. So I started coding a Collector that does this operation for me in one go. I won’t go into detail of how a Collector works, but this blog-post helped me out a lot understanding it.
Finally I ended up with this solution, which I’ve uploaded to github:
This file contains bidirectional Unicode text that may be interpreted or compiled differently than what appears below. To review, open the file in an editor that reveals hidden Unicode characters. Learn more about bidirectional Unicode characters
This file contains bidirectional Unicode text that may be interpreted or compiled differently than what appears below. To review, open the file in an editor that reveals hidden Unicode characters. Learn more about bidirectional Unicode characters
Obviously it was late yesterday ^^ The solution I posted was hidden in another answer with less upvotes. It suggest using Collectors.collectAndThen together with the sequence-method above. In my opinion this is cleaner than following my approach with writing the Collector on your own (DRY-principle). The final solution is posted below and it contains another Collector-factory method that can be used if you’re not interested in the results or the CompletableFutures to collect are of type Void.
This file contains bidirectional Unicode text that may be interpreted or compiled differently than what appears below. To review, open the file in an editor that reveals hidden Unicode characters. Learn more about bidirectional Unicode characters
Note: Unfortunately, the dependencies to rxjava1 haven’t been removed completely in 2.4.0. RX users please checkout version 2.4.1.
I’m happy to announce the release of vertx-jooq 2.4. The main driver behind this release was the dependency upgrade to vertx 3.5 and thus the change of the rx-dependency in vertx-jooq-rx from rxjava to rxjava2. In addition, the JSON key names of the generated POJO are now the same as their database counterparts. This change has been announced here. Last but not least, a bug has been fixed when dealing with JsonObjectConverter or JsonArrayConverter.
In this blog post I’ll describe how to deploy and setup a maven driven Java application on AWS ElasticBeanstalk with different staging profiles. To understand what’s going on, you should have knowledge about AWS and how to setup an ElasticBeanstalk environment.
I have setup this github-repository which contains a very basic maven project. Let’s have a look at it’s pom:
This file contains bidirectional Unicode text that may be interpreted or compiled differently than what appears below. To review, open the file in an editor that reveals hidden Unicode characters. Learn more about bidirectional Unicode characters
No big surprises here: we set the compiler level to Java 8 and tell maven to build an executable fat-jar called app.jar during package-phase. The main itself just prints the passed arguments in the console as shown below:
This file contains bidirectional Unicode text that may be interpreted or compiled differently than what appears below. To review, open the file in an editor that reveals hidden Unicode characters. Learn more about bidirectional Unicode characters
Executing mvn clean install should generate the class files and a runnable jar file in the target-folder. One could take this file and upload it to ElasticBeanstalk. We’re done.
Just kidding.
Two problems may arise:
ElasticBeanstalk will reject the file the next time you upload it, because it already has a file called app.jar.
The application wouldn’t print any arguments, because you haven’t passed any to it.
Solving the first problem is quite easy: you can just append the current timestamp (or project version) to the jar. Either manually, or by changing the finalName-tag to something like
app-${project.version}
or
app-${maven.build.timestamp}
However this doesn’t solve the second problem. To tackle this, one must understand how the application is started after it was deployed. On the EC2-instance, next to the uploaded jar-file there is a file called Procfile, which is used to start the jar. By default, it consists of a one-liner:
web: java -jar app.jar
The only thing you need to know regarding the first word web is:
The command that runs the main JAR in your application must be called web, and it must be the first command listed in your Procfile.
Good news is, that a user can upload it’s own Procfile which leads us to the question: where to put the arguments, especially if you have different arguments for each staging profile. At first sight, a good fit are maven-profiles, but that solution has two major drawbacks: secret informations like passwords should not be stored in your pom. And secondly, each time you change the arguments, you have to redeploy the whole application.
A much better approach is to store that kind of data on the instance itself using ElasticBeanstalk’s configuration. To do so, go to your environment, select the application you are using (or create a new one based on Java SE-Platform), click on Configuration, Software Configuration and create two new environment variables: JAVA_OPTS and JAVA_ARGS. Set the value of JAVA_OPTS to something like -Dfile.encoding=utf8 and JAVA_ARGS to my_staging_property. The values are now available on the instance – time to create our own Procfile. To do so, I’ve created a bash-script (Windows users look here) like this:
This file contains bidirectional Unicode text that may be interpreted or compiled differently than what appears below. To review, open the file in an editor that reveals hidden Unicode characters. Learn more about bidirectional Unicode characters
Lines 3 and 4: I decided to append the timestamp to the build artifact to fix the redeploy issue.
Line 6, 7 and 8: Our Procfile just executes another shell script, called run.sh. That script uses the environment variables defined above to start the application.
Line 9: Zip everything into one file.
So instead of executing maven directly, run ./build.sh from the terminal. This will create a file with a name like app-2017-05-03_14-50-07.zip in the target/ – folder of your maven project which can then be deployed to any staging environment. Configuration is solely done by ElasticBeanstalk. E.g. set JAVA_OPTS to -Xmx256M on your dev-environment and -Xmx16G on production. Changing some parameters only requires to update your EB-configuration (e.g. tune some GC-settings during a load test) instead of redeploy everything.
Getting asynchronous operations right is hard. And when you have to pass a result of one function to the next, it can only get worse. Since today, vertx-jooq’s API for instance only allowed asynchronous operations with a callback handler, which leads to code fragments like this:
This file contains bidirectional Unicode text that may be interpreted or compiled differently than what appears below. To review, open the file in an editor that reveals hidden Unicode characters. Learn more about bidirectional Unicode characters
What annoys me about this is that I have to define in each handler if it succeeded and what to do if an exception occurred on the database layer. Especially when you have to nest three or more operations this looks ugly. Of course this problem is not new and there exists an alternative approach which is using and composing Java 8 java.util.concurrent.CompletableFuture. By doing so, the same code becomes easier and more readable:
This file contains bidirectional Unicode text that may be interpreted or compiled differently than what appears below. To review, open the file in an editor that reveals hidden Unicode characters. Learn more about bidirectional Unicode characters
But using CompletableFuture within the Vertx world leads to a problem: Vertx has it’s own threading model to achieve the performance it actually has. On the other hand, some methods of CompletableFuture, e.g. CompletableFuture.supplyAsync(Supplier), run tasks on the common ForkJoinPool which would break the Vertx contract. Open-source-software to the rescue, there is a solution to this problem: VertxCompletableFuture. This special implementation guarantees that async operations run on a Vertx context unless you explicitly specify an Executor in one of the overloaded xyzAsync-methods*.
And here comes even better news: starting from version 2, vertx-jooqalso supports this way of dealing with asynchronous database operations by utilizing VertxCompletableFuture. Checkout the new vertx-jooq-future module and the according code generator to create your CompletableFuture-based DAOs.
* There have been discussions in the Vertx developer group about a CompletableFuture based API, e.g. here and especially here. The current status is that they do not provide such API officially, mostly because VertxCompletableFuture breaks the contract of the supplyAsync-methods, since it runs within the Vertx context and not the ForkJoinPool. Also when you pass this CompletableFuture subclass to code that expects a regular CompletableFuture, it breaks the Liskov substitution principle and OOP (thanks for pointing that out in the comments Julien). My opinion is, that if you are using Vertx you are aware of the special threading model and can tolerate that behavior. But, of course, it’s up to you.
All good things come to an end: that’s what I thought when Parse announced it’s shutdown. Back then, Parse was the best “push notifications as a service”-solution that offered a REST-API to send and schedule cross platform push notifications through a backend service. Because we used it in one of our products, we had to look for a replacement and so I finally stumbled upon OneSignal.
Like Parse, it offers cross platform pushes, a ton of clientside SDKs to easily integrate it in various languages and a solid REST-API to trigger push notifications through a backend. And last but not least, it doesn’t cost any money*.
As you might have noticed in my recent posts I use Vertx a lot. So I thought it would be a good idea to write a library that allows you to send push notifications using OneSignal the Vertx-way. You can see this library as a wrapper around OneSignal’s REST-API that gives you compile-time validation instead of a trial and error approach.
I’ve recently published a library that connects two frameworks I used a lot in the past: Vertx and jOOQ. Vertx is a “reactive tool-kit for the JVM” that enables you to write non-blocking code and has some nice features built in, like webserver/socketserver-implementation, a message-bus that can run on one or more instances in one network and many more goodies you should check out. On the other hand, if you are coding in Java and you like SQL, there is no way around jOOQ. In my opinion, jOOQ’s two killerfeatures are the possibility to write typesafe SQL and the awesome code-generator that generates POJOs, DAOs and Table-implementations based on your database schema (schema first!). However jOOQ is using JDBC under the hood which blocks the calling thread until the database operation completes.
That is where my library hooks in: it provides a code-generator that adds non-blocking CRUD-methods to all generated DAOs and converter methods that allow you to convert from Vertx’ JsonObject into jOOQ’s POJOs and vice versa.
For code examples, please refer to the github-page.