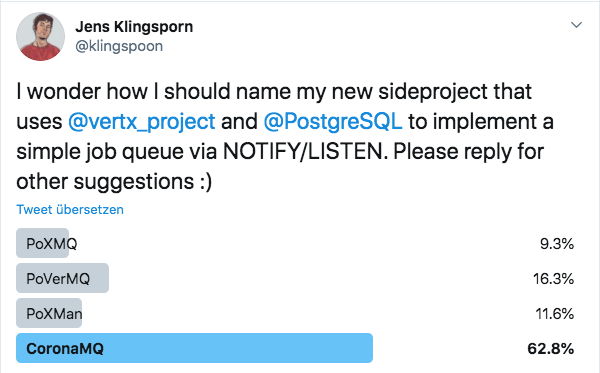
It’s been a while since I started this pet-project of mine: it was a proof-of-concept message queue that uses PostgreSQL, the vertx-postgres-driver and it’s NOTIFY LISTEN support. The idea was, that if a row was added in to a table (jobs, tasks, you name it), Postgres would send a notification to the driver. The driver would then send this notification, alongside with the task’s payload, over the vertx eventbus and some worker would react to it. The following figure visualizes this concept:
This was already two years ago and since then I didn’t invest more time into it – like with any other sideproject you start. But then, two things happened: vertx added support for Future-APIs in their code-generator and I caught Covid – no joke. I started to play around with the code-generator and created APIs for mutiny and rxjava. I read about and added vertx-service-proxies for the TaskRepository, decoupled the participants (Broker, TaskRepository and Workers) using vertx-service-discovery, added metric-profiling with Mircometer and started using Testcontainers for the integration tests.
Now, again, a couple of months later, I finally found some time to upload the project to maven-central and share it with the world. I’m happy with the result and think it’s a cool real-world-application that uses awesome open source libraries. If you have any feedback, I’m happy to hear it, either in the comments, on Twitter or on the github-page.
This release comes with nice benefits for the reactive modules. Users had a hard time in the past if they wanted to map a JSONB-column to a custom POJO. If they created a custom jOOQ-Converter, the generated entity would map the field to the POJO as expected, but they couldn’t really work with it, because the mapping between the POJO and the reactive-driver data types was unknown. For that matter, there is now a new PgConverter that you can use in the reactive modules. Checkout this example for a how-to.
I’m happy to announce the release of vertx-jooq 4.0.0 with many nice additions, such as support for a new, blazing fast postgres driver, a unified QueryExecutor interface and many more things. Checkout the GitHub-Page of the project to find out why you should upgrade and how to migrate from 3.x.
The last couple of weeks I’ve been working on the fourth version of vertx-jooq. Although the 3.x branch was released not that long ago, I decided to draft a new major version as many features have been added and also some API changes have been made. The main focus however was the integration of a new reactive driver for vertx which was ranked number one in the TechEmpower benchmark, round 15.
Checkout the project’s GitHub-page to see about what else has been added and how to upgrade!
Just some minutes ago, I’ve released the third major version of vertx-jooq – your favorite jOOQ-wrapper for vertx! This release merged vertx-jooq and vertx-jooq-async*: now you are free to choose, not only between three different APIs, but also the underlying database-driver (async or JDBC) – without the need to change the APIs. Of course this is not the only feature – read more about the release, how to use it and about the (unavoidable) breaking changes on GitHub.
* Because the async-driver is now incorporated into vertx-jooq there is no need to maintain vertx-jooq-async.
When working with OneSignal, you sometimes receive an API response telling you that the notification you’ve sent does not have any recipients (“All players are not subscribed”). This can either mean that the notifications you’ve setup are not working like intended (e.g. you’re using wrong filters) or that a former active user of yours became inactive and cannot be addressed any longer. In case you are targeting users using tags this can happen quite frequently.
To avoid the cost of creating a OneSignalException in that case there is an option now to prevent vertx-push-onesignal from creating these exceptions in case that response is received from the OneSignal API.
See my github-page for an example how to set it up properly.
JMX is useful to gather various information about a running Java application. Mostly it is used to gain detailed data about CPU-consumption (where are the hotspots in my code?) or Memory-allocation (what is eating up my memory?). Especially when a system is under load and behaves ‘unexpectedly’ that information is valuable. Here are the steps you have to take in order to get remote access to JMX when you host your servers in the Amazon cloud behind a loadbalancer.
1. Associate Public IP Address
The servers that are created in your ElasticBeanstalk environment need to have a public IP-Address. To do this, make sure you’ve selected the following option in your Elastic Beanstalk environment’s configuration:
Elastic Beanstalk → Your Application → Your Environment → Configuration → VPC → Associate Public IP Address
Be aware that exposing the instances behind a LB undermines it’s purpose: only having one public end-point. By making all your instances public, they are open for attacks of any kind!
2. Change server startup parameters
A quick search on stackoverflow reveals the required arguments you have to add to your Java application:
In a previous post I’ve described how to pass these arguments to the Java application (add them as JAVA_OPTS) and choosing a PORT is trivial. However you should use the same port for .port and .rmi.port to minimize the ports you have to open in the security group later on.
Now what about the PUBLIC_IP? If you leave out this parameter, JMX will most likely bind to the private IP-Address and you wont be able to access it from outside. My first attempt was checking the instance’s environment variables to see if the server’s public IP is added there. Unfortunately it was not. My second attempt was to expose an environment variable JMX_IP utilizing .ebextensions like this:
The idea was to export an environment variable JMX_IP and then reference it in the JAVA_OPTS like so -Djava.rmi.server.hostname=${JMX_IP} which did not work as well. I’m not sure why (maybe you know?), but I ended up changing the script that builds my deployment artifact:
This file contains bidirectional Unicode text that may be interpreted or compiled differently than what appears below. To review, open the file in an editor that reveals hidden Unicode characters. Learn more about bidirectional Unicode characters
This results into the following run.sh file which is executed during deployment:
This file contains bidirectional Unicode text that may be interpreted or compiled differently than what appears below. To review, open the file in an editor that reveals hidden Unicode characters. Learn more about bidirectional Unicode characters
As you can see, the public ip address is fetched from the instance’s meta-data URL and added as an option to the Java process. If you added the startup parameters from above, the server should start JMX and expose it on the public IP address.
3. Open JMX port in security group
In the final step you have to open a port to be able to connect to your server. Before we proceed, be aware that we disabled any authentication! That means that as soon as the port is open, anyone that knows the IP of your server can access to it. Therefore, either close the port as soon as you’re finished your work and/or add SSL to your JMX configuration!
To open the port, I recommend creating a new security group under
EC2 → Security Groups → Create Security Group
in your VPC. Add an Inbound rule to open a TCP port you’ve chosen for JMX (if you decided to give a different port for rmi, it has to be opened as well) and add your IP address as the source. Note the security group’s name (e.g. sg-abcdefg) and add it to your Elastic Beanstalk configuration:
Elastic Beanstalk → Your Application → Your Environment → Configuration → Instances → EC2 security groups
Finally, you should be able to add and connect the EC2 instances using jvisualvm.
vertx-jooq-async the (un)beloved child of vertx-jooq has been released in version 0.4! This version finally implements insertReturningPrimaryAsync in all VertxDAOs*.
In addition, the complex code in the DAOs default methods has been abstracted and moved to vertx-jooq-async-shared. That means less code duplication and fewer points of failure – a move that will very likely be done in vertx-jooq soon as well.
Finally the vertx-dependency version has been bumped to 3.5. (and so the support for RXJava2).
* Unfortunately, this only works for MySQL and numeric auto-increment keys. That is, because the implementation is based on the implementations of io.vertx.ext.asyncsql.impl.AsyncSQLConnectionImpl and only the MySQL variant returns the generated ID.
Sometimes I find myself in the situation where I have to perform some asynchronous tasks and perform another asynchronous task when all those tasks have been completed. As always in such situations, I’ve searched stackoverflow for a how-to and the top rated answer suggests the following solution:
This file contains bidirectional Unicode text that may be interpreted or compiled differently than what appears below. To review, open the file in an editor that reveals hidden Unicode characters. Learn more about bidirectional Unicode characters
That solution totally works and it is good. However, if you often deal with Streams, a more functional approach would be neat. So I started coding a Collector that does this operation for me in one go. I won’t go into detail of how a Collector works, but this blog-post helped me out a lot understanding it.
Finally I ended up with this solution, which I’ve uploaded to github:
This file contains bidirectional Unicode text that may be interpreted or compiled differently than what appears below. To review, open the file in an editor that reveals hidden Unicode characters. Learn more about bidirectional Unicode characters
This file contains bidirectional Unicode text that may be interpreted or compiled differently than what appears below. To review, open the file in an editor that reveals hidden Unicode characters. Learn more about bidirectional Unicode characters
Obviously it was late yesterday ^^ The solution I posted was hidden in another answer with less upvotes. It suggest using Collectors.collectAndThen together with the sequence-method above. In my opinion this is cleaner than following my approach with writing the Collector on your own (DRY-principle). The final solution is posted below and it contains another Collector-factory method that can be used if you’re not interested in the results or the CompletableFutures to collect are of type Void.
This file contains bidirectional Unicode text that may be interpreted or compiled differently than what appears below. To review, open the file in an editor that reveals hidden Unicode characters. Learn more about bidirectional Unicode characters
Note: Unfortunately, the dependencies to rxjava1 haven’t been removed completely in 2.4.0. RX users please checkout version 2.4.1.
I’m happy to announce the release of vertx-jooq 2.4. The main driver behind this release was the dependency upgrade to vertx 3.5 and thus the change of the rx-dependency in vertx-jooq-rx from rxjava to rxjava2. In addition, the JSON key names of the generated POJO are now the same as their database counterparts. This change has been announced here. Last but not least, a bug has been fixed when dealing with JsonObjectConverter or JsonArrayConverter.